
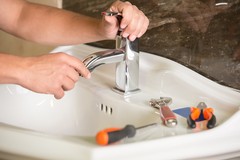
A steady drip from your bathroom sink might seem harmless, but that small sound can add up to gallons of wasted water and, eventually, real damage to your cabinetry, flooring, and walls. Learning how to repair a leaking faucet in the bathroom is one of the most practical skills a homeowner can pick up, and in most cases it does not require a professional plumber. As a trusted damage restoration company in Lansing and its nearby communities, we have seen firsthand how a neglected leak can turn into a costly water problem when moisture seeps into places it was never meant to reach.
The good news is that most faucet leaks come from worn or inexpensive parts that are easy to swap out. With a few common tools and a little patience, you can stop the drip, protect your home, and save money on your water bill. This guide walks you through the process from start to finish.
Why a Small Leak Deserves Your Attention
It is tempting to ignore a slow drip, especially when life gets busy. But water is persistent, and even a minor leak can quietly warp the base of your vanity, loosen tile, and create the damp conditions that mold thrives in. Over time, the repair bill for that hidden moisture damage can far exceed the cost of a replacement washer or cartridge.
Beyond the structural concerns, a leaking faucet wastes a surprising amount of water. A faucet that drips once per second can waste thousands of gallons over the course of a year. Addressing the issue early is good for your wallet and for your peace of mind, and it keeps a small annoyance from becoming a much larger project.
Gather Your Tools and Identify the Faucet Type
Before you begin to repair a leaking faucet in the bathroom, take a moment to collect what you need. Most repairs call for an adjustable wrench, a set of screwdrivers, replacement washers or a cartridge, plumber's grease, and a clean rag. Having a small bowl nearby helps keep track of tiny screws and parts as you disassemble things.
Faucets generally fall into a few categories, and knowing yours makes the job easier. Compression faucets have separate hot and cold handles and rely on rubber washers. Cartridge, ball, and ceramic disc faucets are common in newer homes and use different internal mechanisms. If you are unsure, snap a photo of the faucet before disassembly so you can match parts at the hardware store.
Step-by-Step Repair Instructions
Once you are prepared, the actual repair follows a straightforward sequence. Work slowly and keep your parts organized so reassembly goes smoothly.
- Turn off the water supply using the shutoff valves under the sink, then open the faucet to release any remaining pressure and water in the line.
- Plug the drain with a rag or stopper so small screws do not disappear down the pipe.
- Remove the decorative handle cap, unscrew the handle, and set the pieces aside in the order you removed them.
- Take out the worn component, whether that is a rubber washer, an O-ring, or an entire cartridge, and inspect it for cracks, mineral buildup, or wear.
- Install the matching replacement part, applying a thin layer of plumber's grease to any rubber pieces to help them seal and last longer.
- Reassemble the faucet in reverse order, turn the water back on slowly, and watch for drips as you test both hot and cold.
If the leak persists after replacing the obvious parts, the problem may be a corroded valve seat or a worn faucet body. At that point, replacing the entire faucet is often more cost effective than continuing to chase the leak with individual parts.
Common Mistakes to Avoid
When homeowners attempt to repair a leaking faucet in the bathroom, a few missteps show up again and again. The most frequent is overtightening. Cranking down hard on handles or connections can crack fittings and crush washers, which actually causes more leaks rather than fixing them. Snug and secure is the goal, not maximum force.
Another common error is installing the wrong replacement part. Faucet components are not universal, and even a slightly mismatched cartridge or washer will fail to seal properly. Bringing the old part with you to the store, or noting the brand and model of your faucet, prevents a frustrating second trip. Finally, do not forget to turn the water back on gradually. A sudden surge of pressure can dislodge a freshly installed part before it has properly seated.
When to Call a Professional
Not every leak is a simple do-it-yourself fix. If you discover water stains on the ceiling below the bathroom, a musty smell that will not go away, or soft spots in the flooring near the vanity, the moisture has likely already caused damage behind the scenes. These are signs that the problem extends beyond the faucet itself and may require expert attention.
Water that reaches subflooring, drywall, or cabinetry needs to be dried and treated properly to prevent mold and rot. This is where our water damage restoration in the Lansing area makes a real difference. Whether you are dealing with a slow leak that went unnoticed or a sudden burst, our crew handles water damage restoration in Okemos, Lansing, and neighboring towns with the equipment and experience to get your home back to normal. For urgent situations, our emergency restoration services are available when you need help quickly.
Protecting Your Home for the Long Term
Once the drip is gone, a little ongoing attention keeps it from returning. Check under your sink periodically for moisture around the supply lines and connections. Wipe down the area so you can spot new drips right away, and replace supply hoses if they show signs of cracking or bulging. Small habits like these catch problems while they are still cheap and easy to solve.
Knowing how to repair a leaking faucet in the bathroom gives you the confidence to tackle a common household issue without stress. The steps are simple: shut off the water, replace the worn part, reassemble carefully, and test your work. Most leaks come down to a few inexpensive components, and the fix rarely takes more than an afternoon.
That said, water has a way of finding the hidden corners of a home, and sometimes the damage is already done by the time a leak is noticed. If you suspect moisture has spread beyond the faucet, do not wait for it to get worse. The team at McCardel Restoration serves homeowners throughout Lansing and the surrounding areas, and we are always ready to answer your questions or provide a thorough assessment. Reach out to us anytime, and we will help you protect what matters most.